Coffee Roaster Controller Intro
In this post I will document the build of my air popper controller to roast quality coffee. I am providing enough detail that someone interested should be able to replicate the project. If you are working on building your own and run into any issues please reach out!

I am a self-admitted coffee snob. A quality cup of black coffee is an essential part of my morning ritual. I like experimenting with coffee and I'm often trying various methods to achieve my ideal brew. Over time I've found my desire for a great cup of coffee is often at odds with my desire to not spend money – quality coffee beans are expensive! When I learned about roasting green coffee beans at home I was hooked. Quality green beans cost $7-10/lb compared to $14-25/lb I usually pay for roasted beans. The added bonus is that roasting my own coffee lets me learn more about the process and experiment with different roast profiles according to my personal tastes.
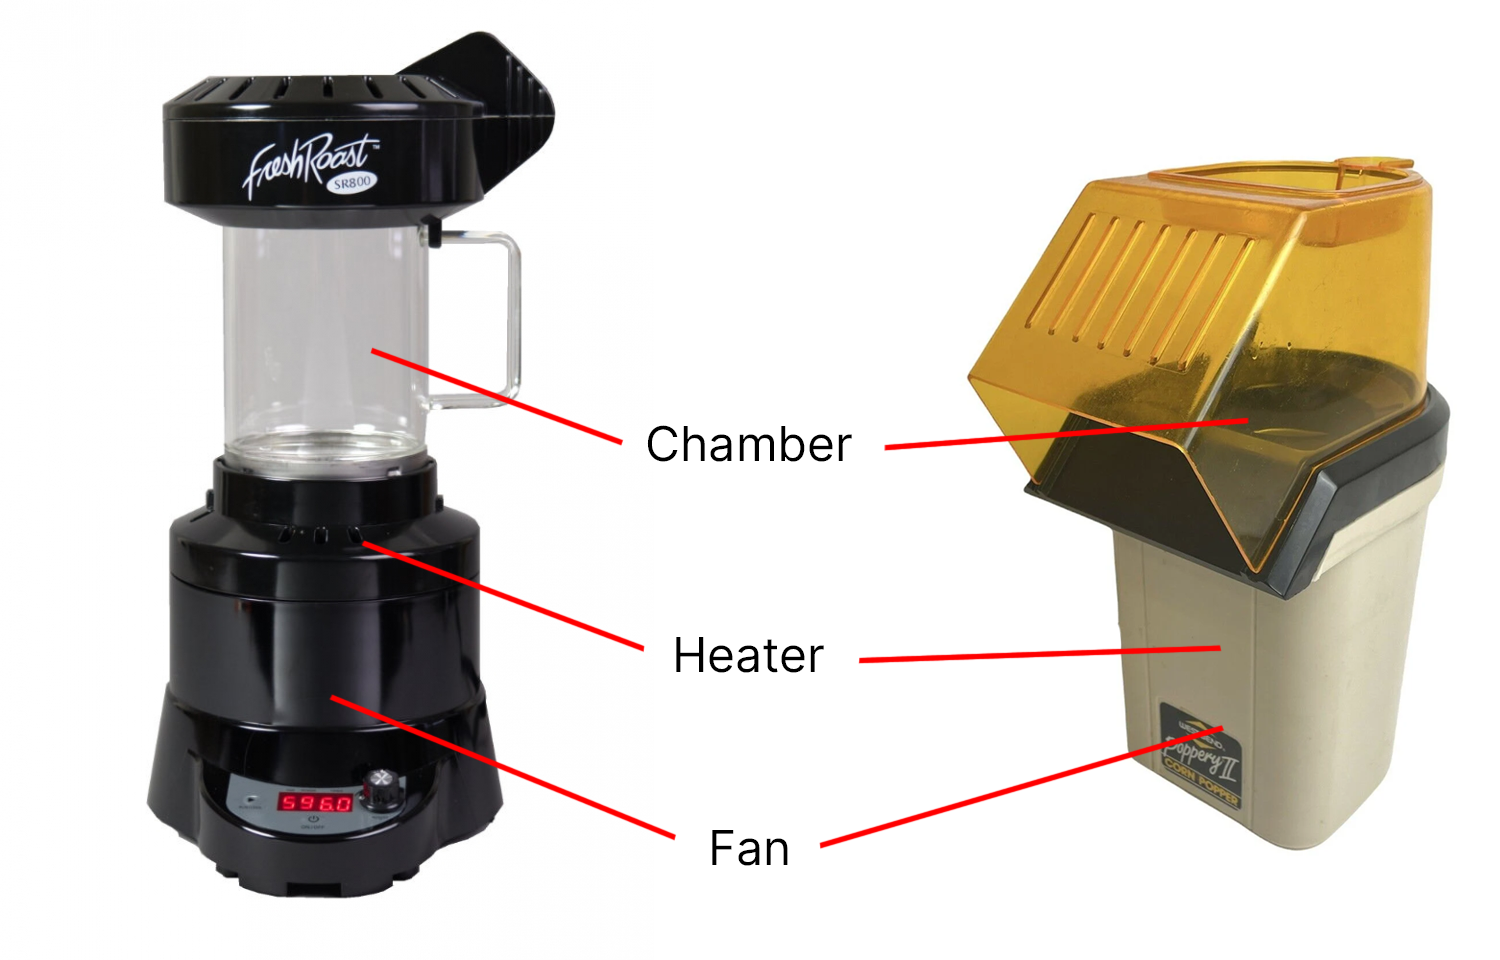
These days there are commercially available coffee roasters for reasonable prices (like the Fresh Roast SR800 [$289]), but when I started roasting coffee in the early 2000's these weren't commonly available. I learned to roast using a popcorn air popper. This is still a popular method today and a great way to get started for those who don't want to drop the cash on a more expensive roaster. The hardware in a popcorn popper is similar to the hardware in commercial roasters like the Fresh Roast and you can achieve great results with a popcorn popper like the Poppery I or Poppery II. These products all use a fan to blow air over a coil of hot wire and then into a chamber that agitates and heats up the kernels/beans.
One major limitation with air poppers is that you cannot control the power output. This means the only variable you can tune is time. Its possible to get great results, but some level of quality is inevitably left on the table. It can also be a bit cumbersome to cool off the beans – it is common to pour the beans out of the roaster into a couple of metal colanders to cool them off. This isn't a major issue, but its a manual step in an otherwise pretty automatic process.
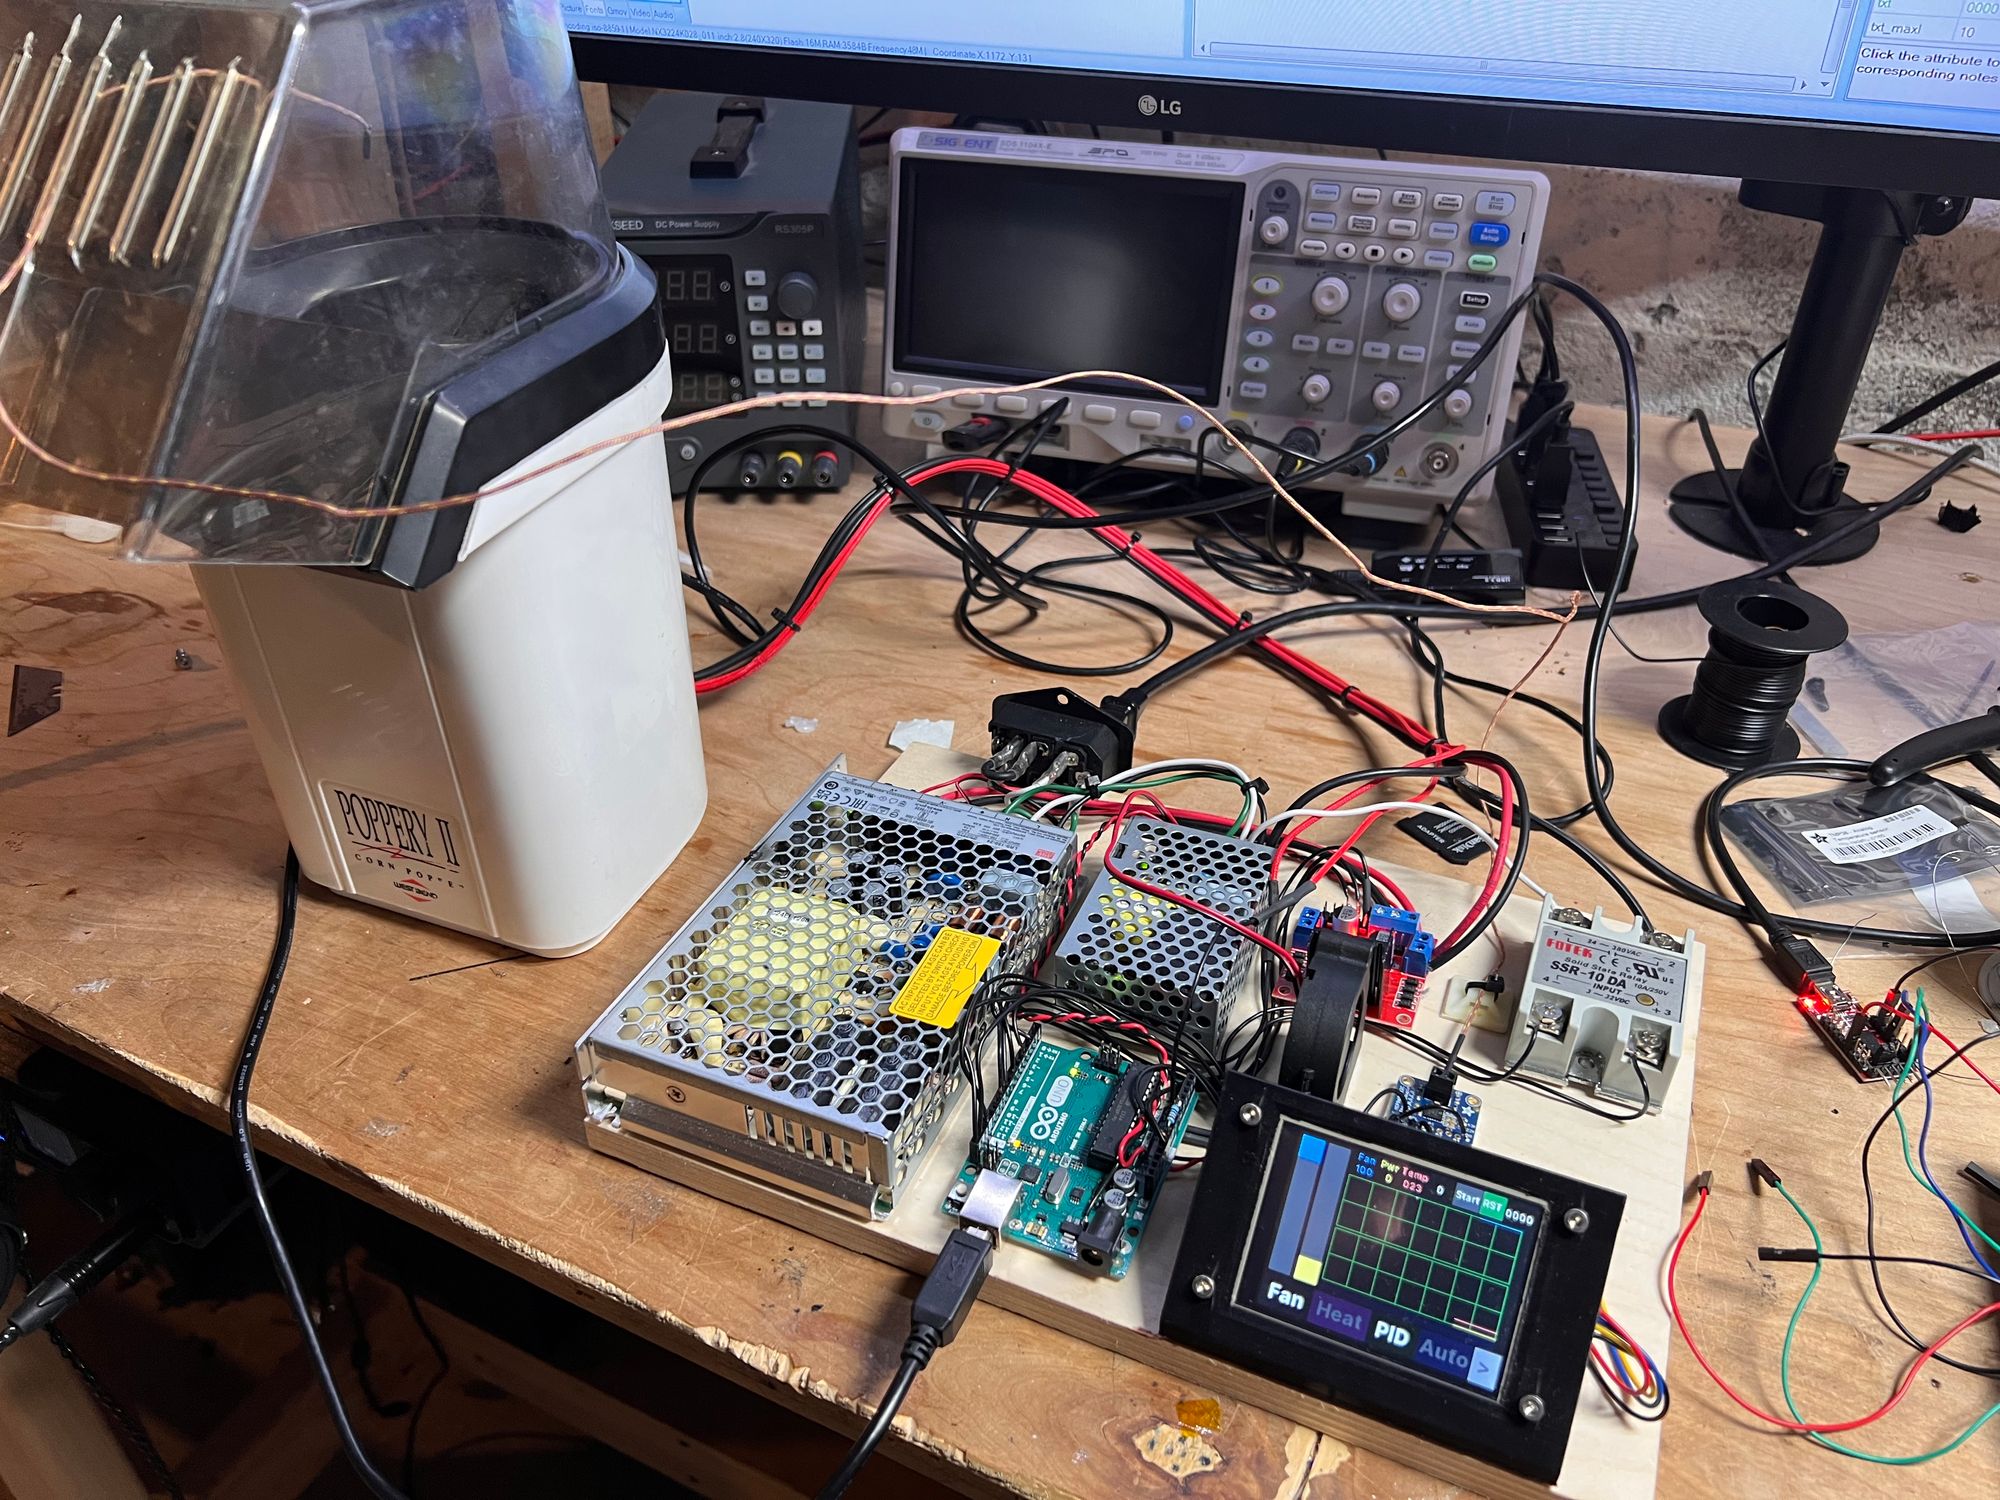
With this background in mind, I decided to build a controller for my West Coast Popper II air popper. I set out with the following goals:
Goals
- Use a West Cost Poppery II air popper ( I already had one)
- Add automated temperature control
- Log temperature over time and display to the user
- Decouple fan and heater for rapid cooling
- Bonus: ability to program automatic temperature profiles
I think I achieved each of the goals and a bit more.
In this post I will document the build of my air popper controller with PID control, temperature logging, and automatic profiles. I'll go over the hardware modifications to the stock air popper, the schematic of the controller, and details about the firmware and user interface design. All of the code is open source and available on Github. I am providing enough detail that someone interested should be able to replicate the project. If you are working on building your own and run into any issues please reach out!
Table of Contents:
Next page: Modifying the Air Popper